General
The LiveDesign Connector is a Spotfire panel developed to increase the integration of LiveDesign and Spotfire from Spotfire Analyst and Web Player. Using the LiveDesign Connector, you can import LiveReport data into Spotfire and create Spotfire templates designed for the LiveDesign Gadget. More LiveDesign related features will be implemented in futur releases.
To use the LiveDesign Connector, follow the steps described below:
- Open the LiveDesign Connector panel
- Launch your Spotfire client (Analyst or Web Player)
- Click on the menu Discngine > LiveDesign Connector [Beta]
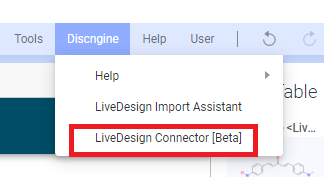
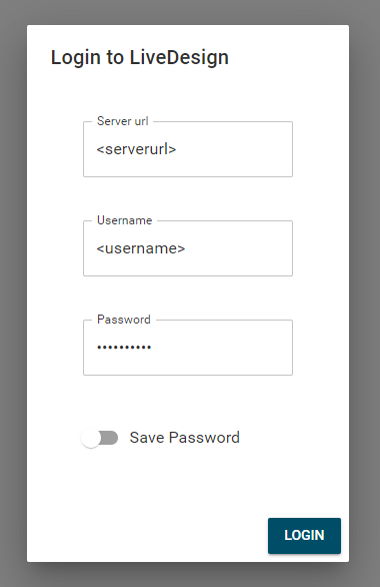
- Login to LiveDesign
- If you are not already connected to LiveDesign, enter your credentials in the opened window
- You can save your password to avoid this step next time
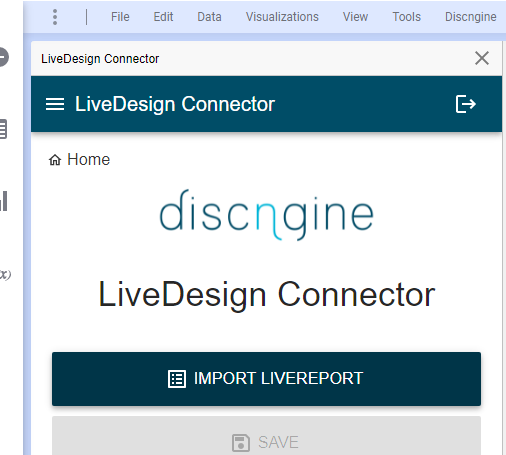
Import LiveReport
- Click on Import LiveReport
- This button is available from the LiveDesign Connector home page or burger menu
- This will open the import page
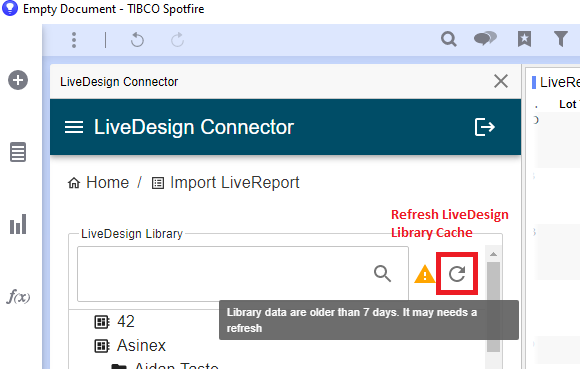
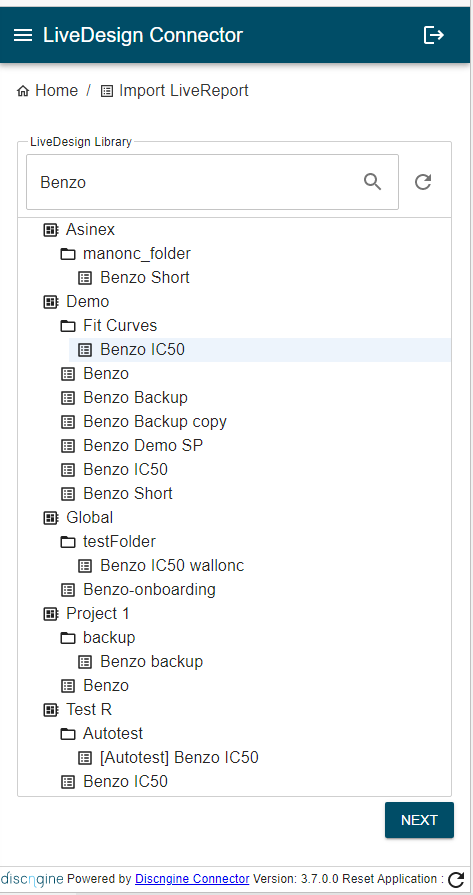
- Select the LiveReport to import
- To find it you can filter the LiveReports based on the name or id, or you can browse the complete LiveDesign tree
- When your mouse is over a LiveReport name, additional information is provided, such as author or id
- Once selected, click on Next
- Set the import options
- Set the name of the import data table
- For now this name must be "LiveReport Data" to be used in the gadget
- Select the structure column(s) you want to generate
- Choose if you want to import the LiveReport in the current document or in a template related to the selected LiveReport
- Set the name of the import data table
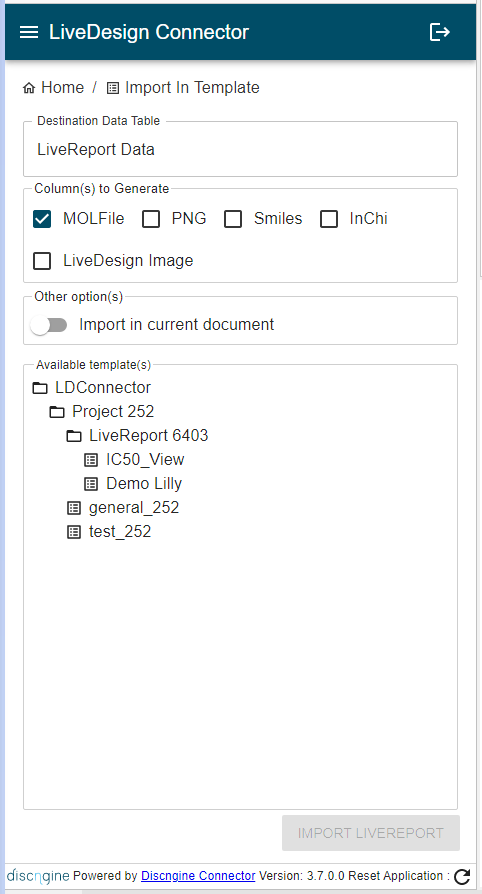
- Click on Import LiveReport
- The import process steps will be displayed
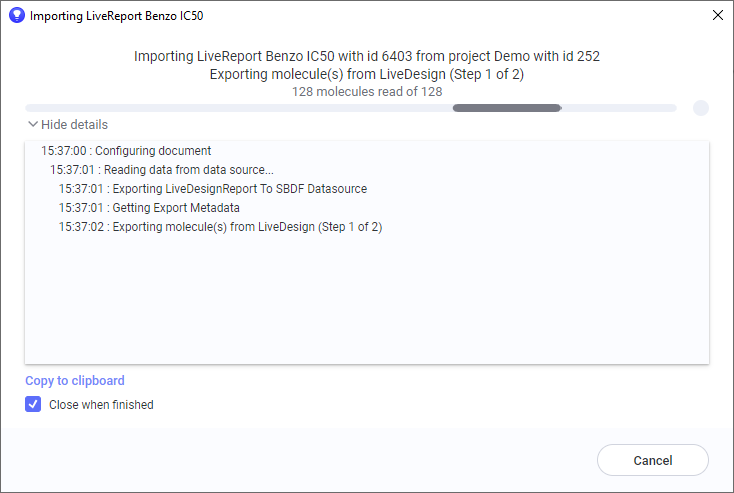
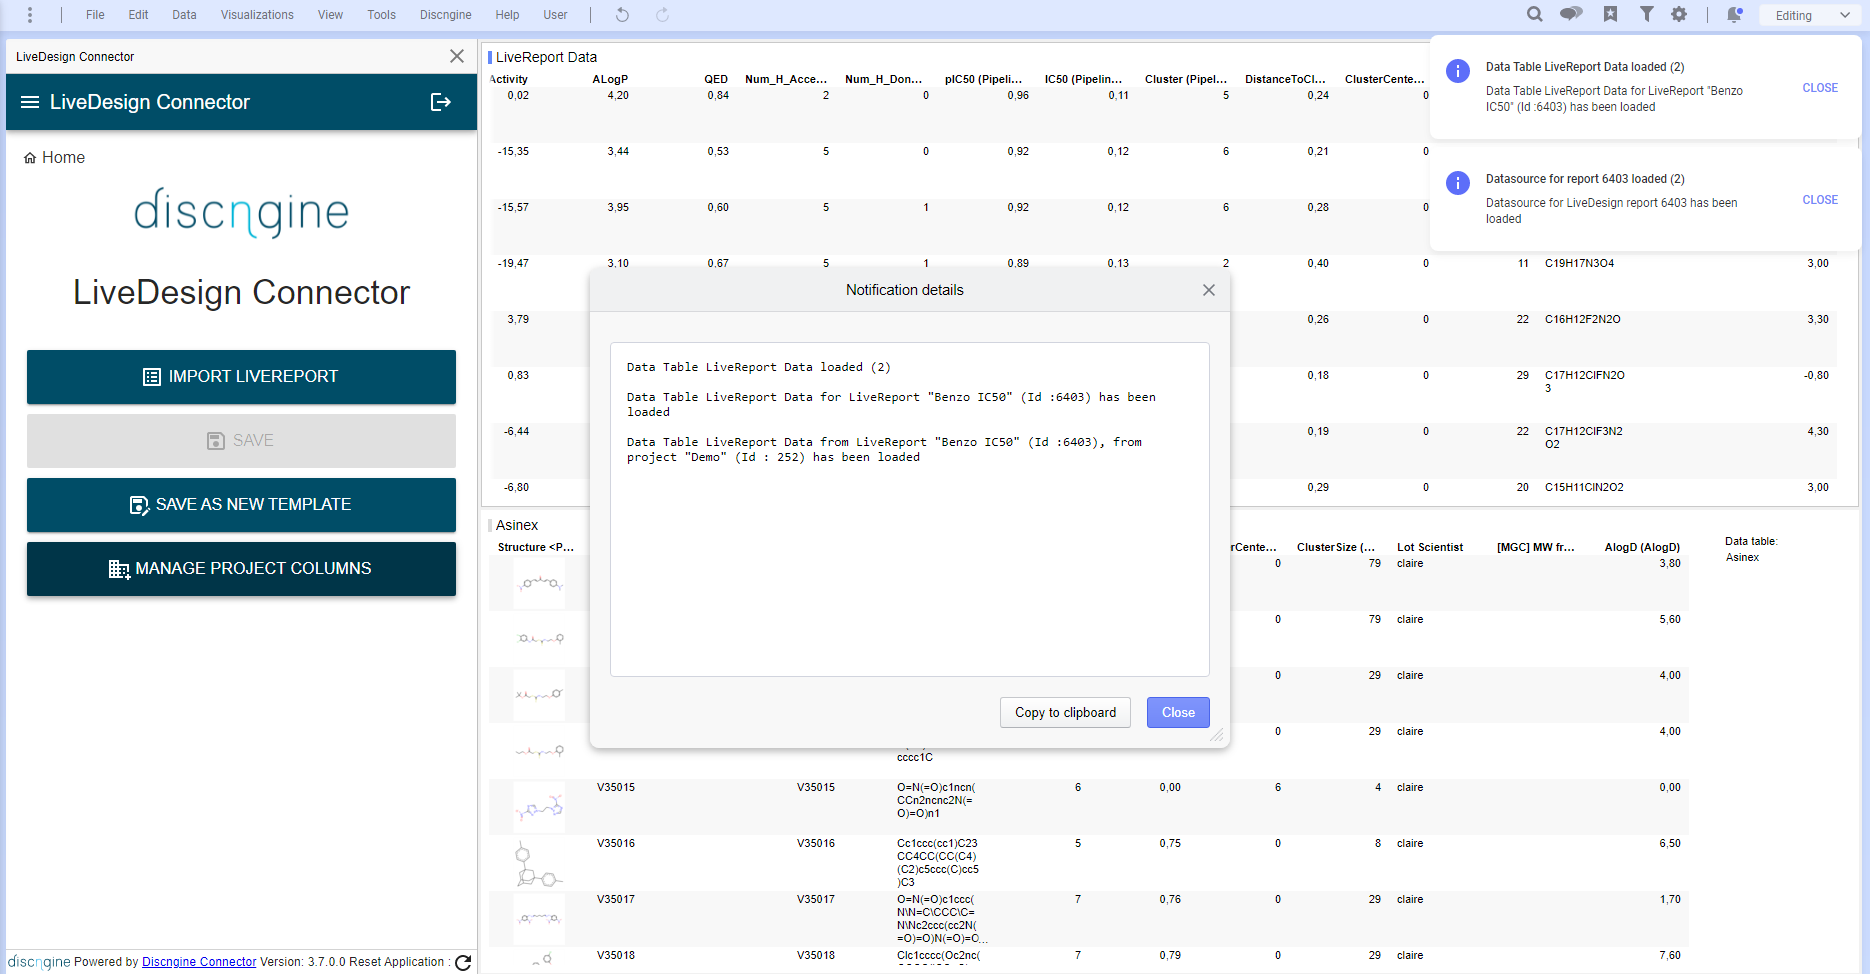
- Once the import is done, you can check the status in the Spotfire notifications
Save
On the home page of the LiveDesign Connector panel, you can save the current Spotfire document using the Save button, only if the document is not the empty document.
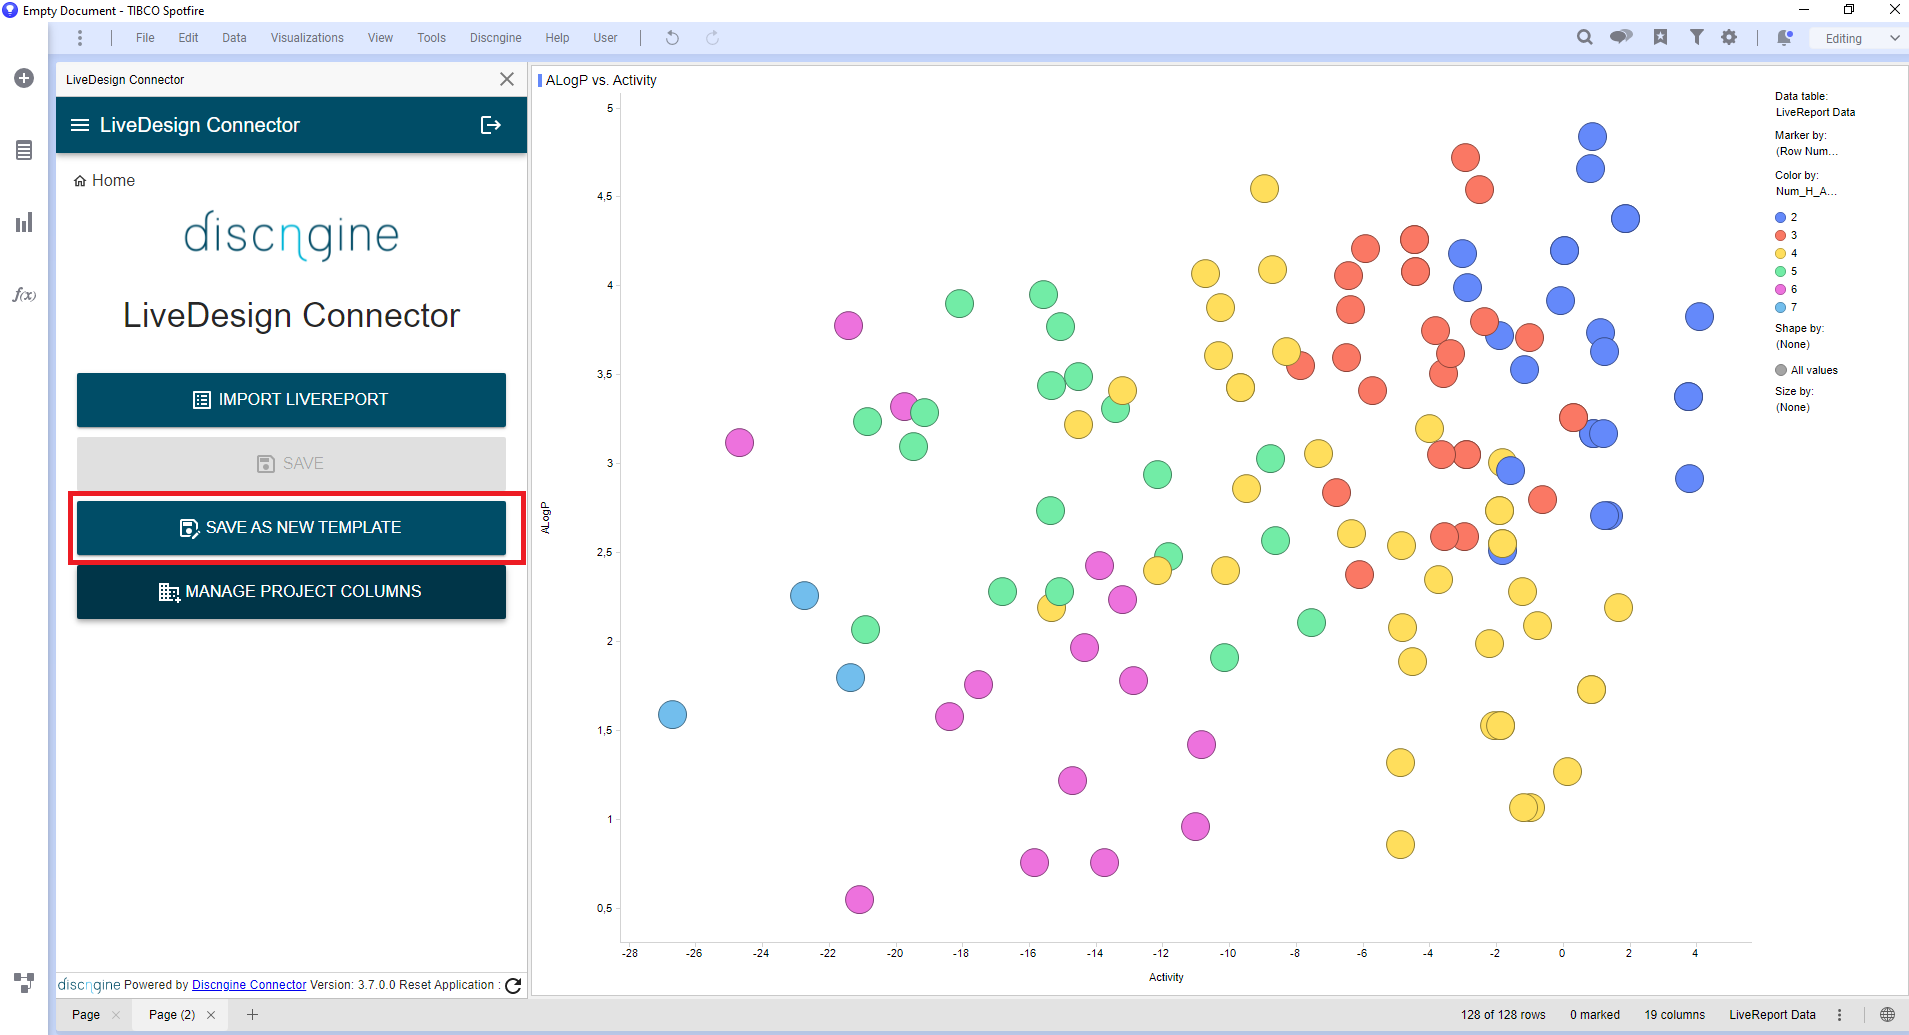
Save as new template
After editing a document having a LiveReport imported into the standard data table ("LiveReport Data" or name defined in the Spotfire preferences), you can save the document as a new template.
- Click on Save as new template
- This button is available from the LiveDesign Connector home page or burger menu
- This will open the save template page
- Set the template name and location
- Check the concerned project and LiveReport
- Set the name of the template
- Set the description of the template
- Choose weither to save the template as global to the project.
- If global, the template will be saved under <DefaultLibraryPath>/Project <Project ID>
- If not global, the template will be saved under <DefaultLibraryPath>/Project <Project ID>/LiveReport <Livereport ID>
- See Document Opening Conventions for more details
- Check the Spotfire library location
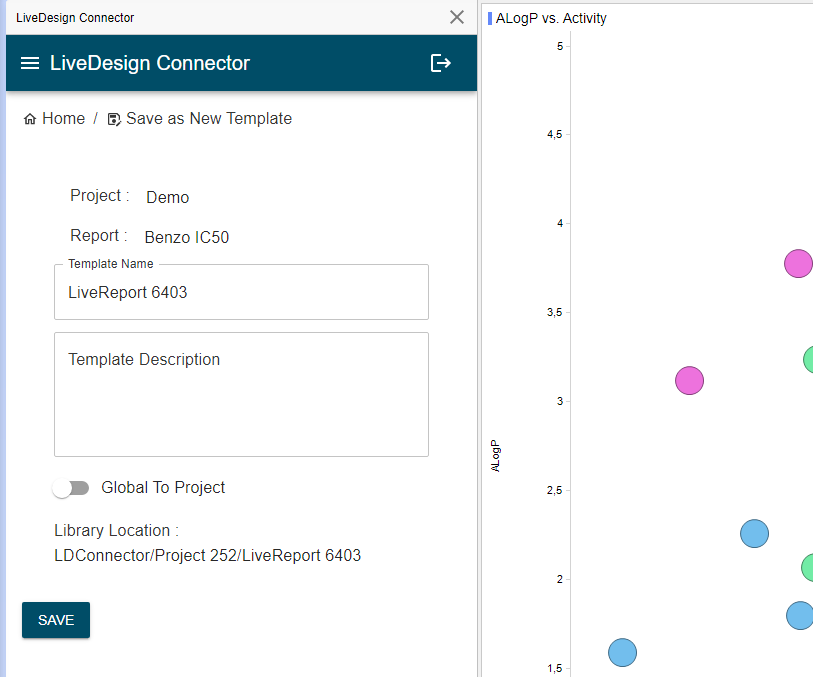
- Click on Save
- The document is saved at the indicated location, and the data table is configured to be in "Stored Data" mode
You can now use the template from the Spotfire Gadget by Discngine.
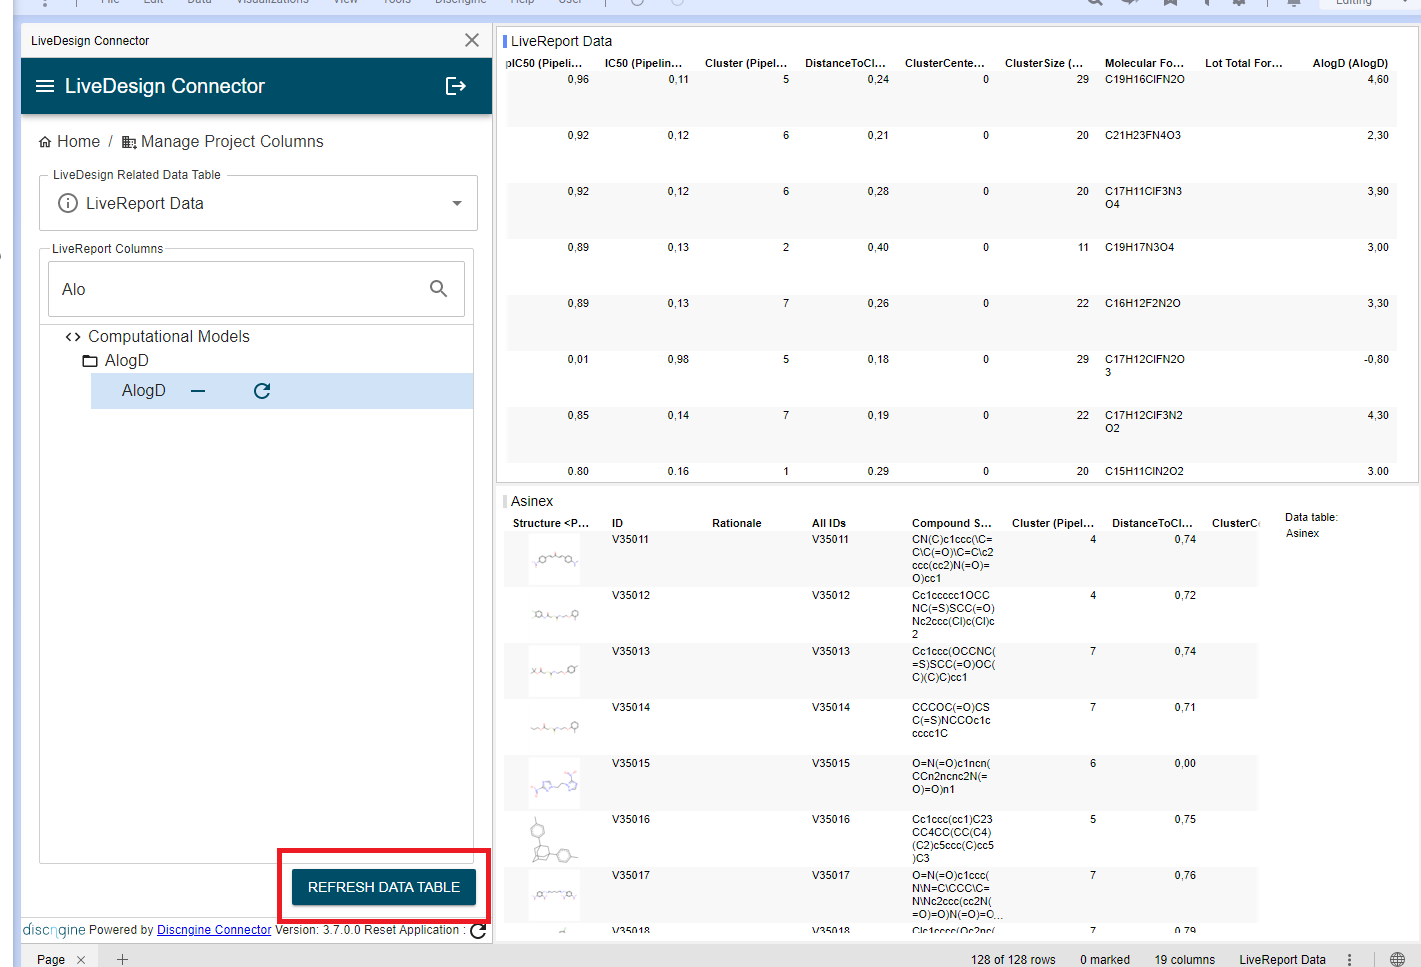
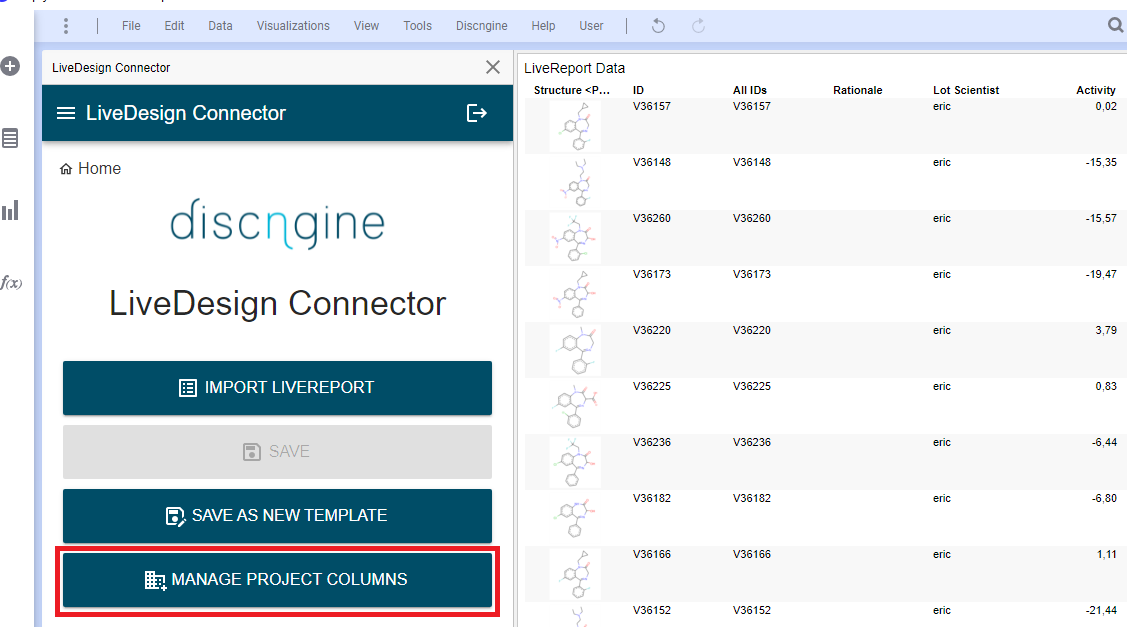
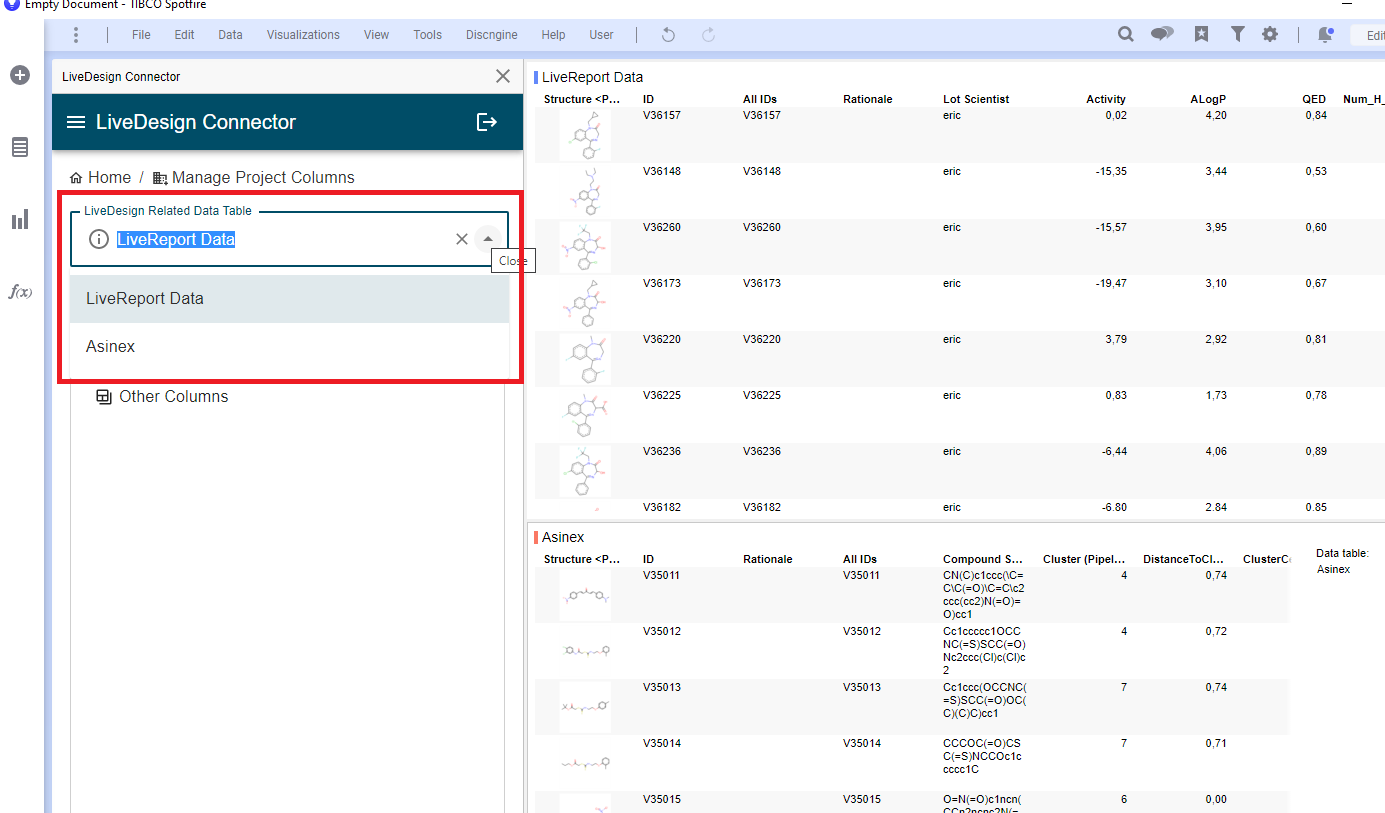
Manage project columns
After importing one or several LiveReports in a Spotfire template, you can manage the list of LiveDesign project columns available in these LiveReports.
NB : currently, only Database columns and Computational Models columns (without parameters) are managed.
- Click on Manage project columns
- This button is available from the LiveDesign Connector home page
- This will open the Manage Project Columns page
- Select the data table for which manage project columns
- This data table must have been imported from a LiveReport
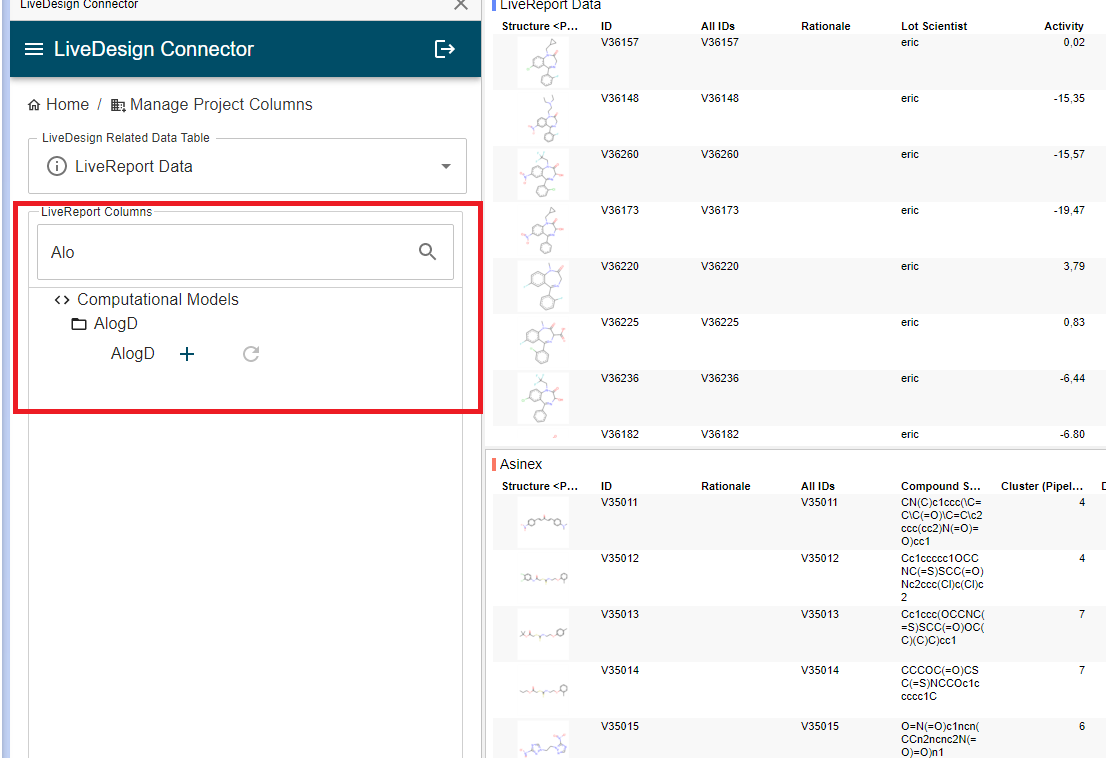
- Search for the column(s) to add/remove
- You can expand/collapse the folders in the column tree view
- You can filter the columns by name in the search field
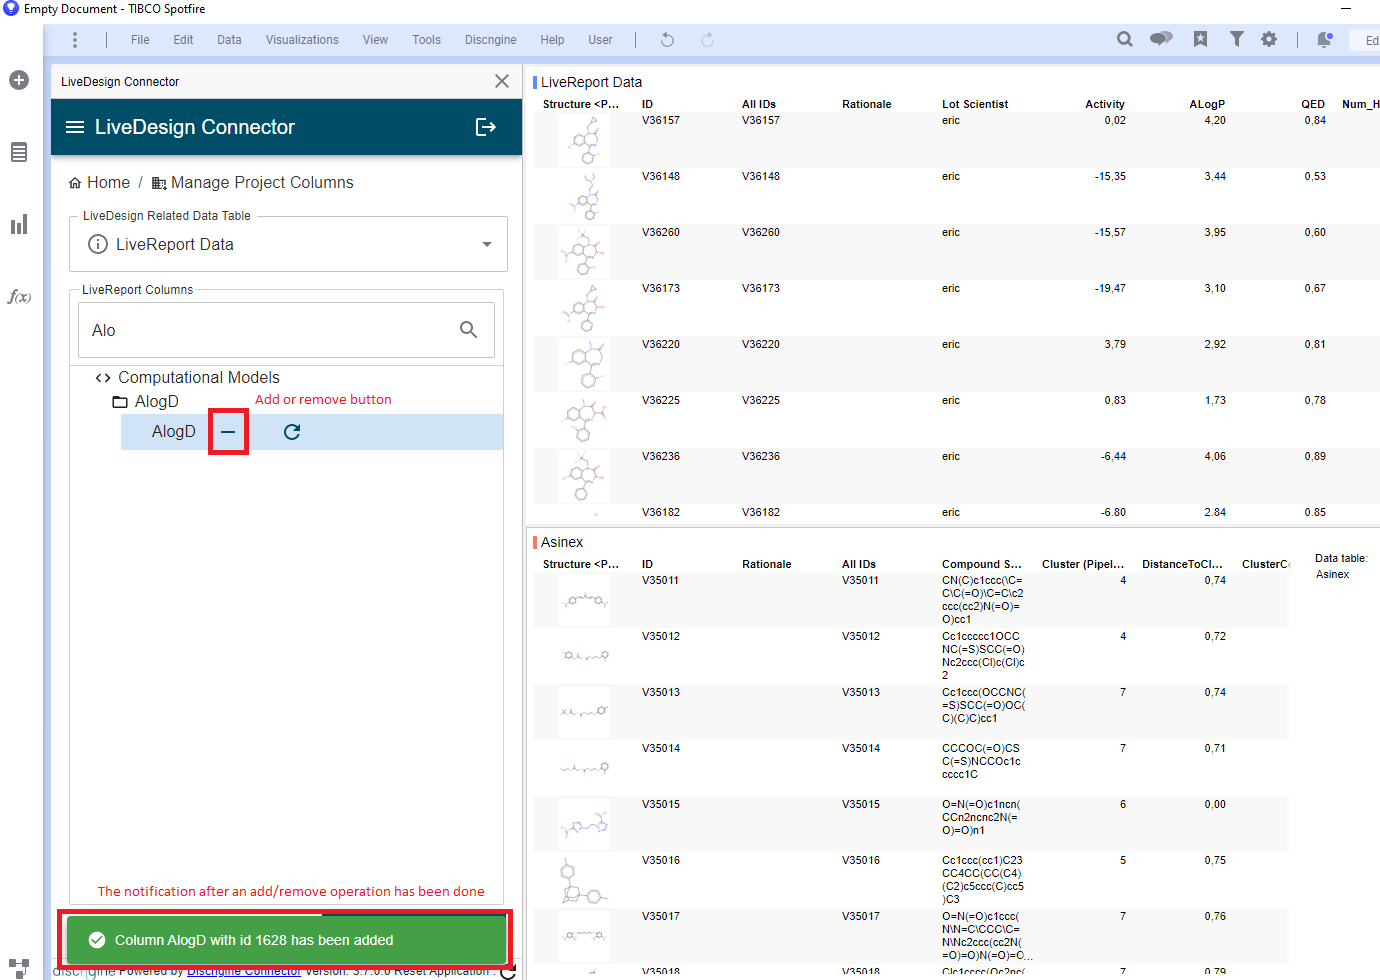
- Add or remove a column in the associated LiveReport
- Click on the Add (+) or Remove (-) button located next to the name of the column
- A notification will be displayed when the column is added or removed successfully
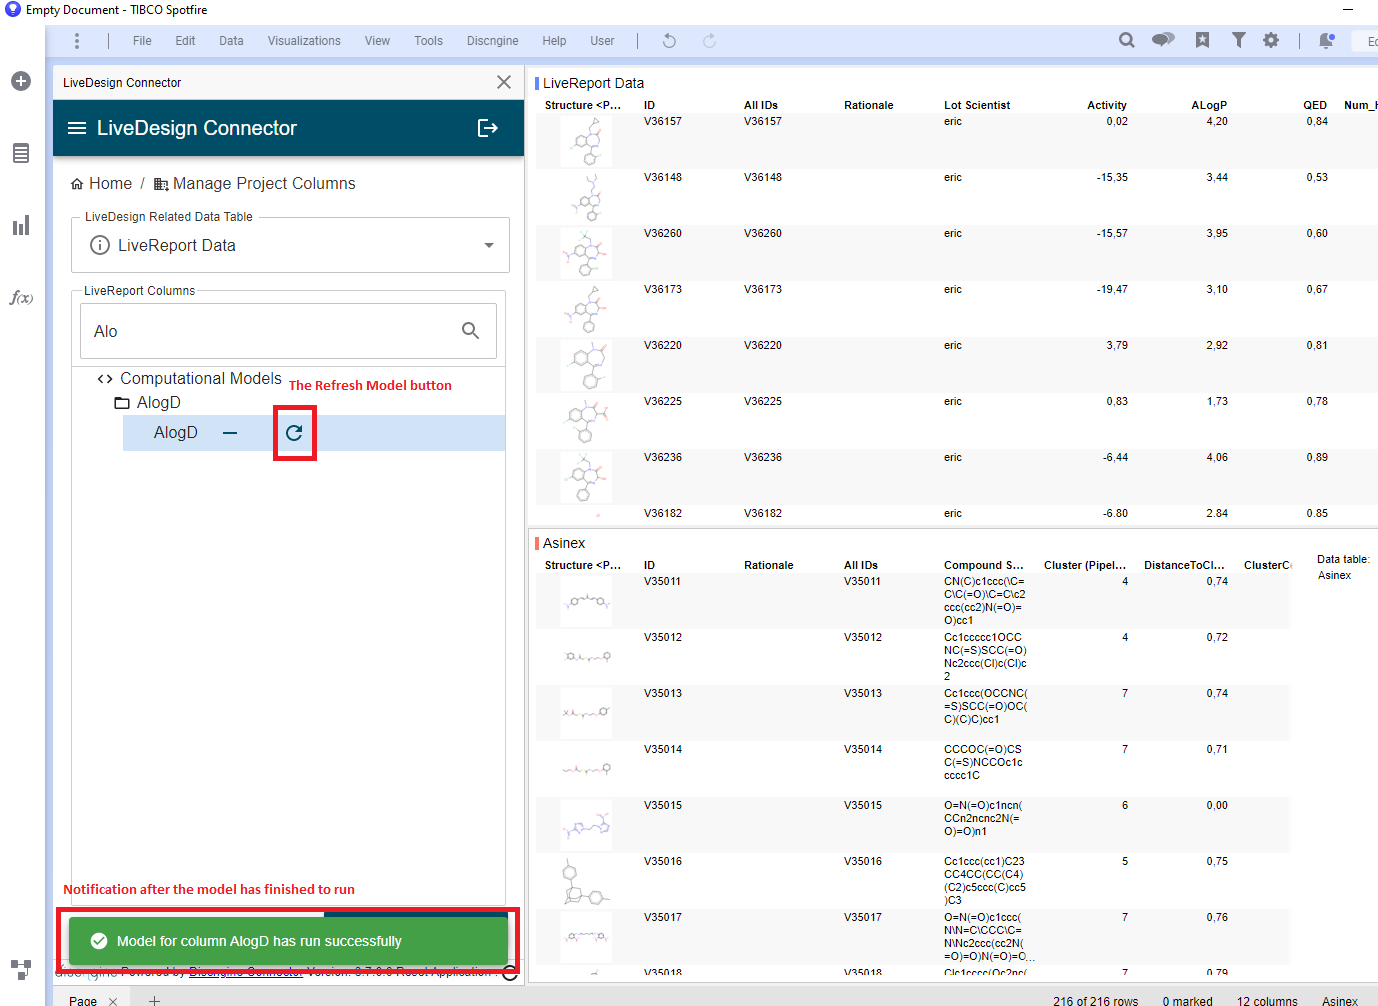
- Refresh the content of a column being part of Computational Models in the associated LiveReport
- Click on the Refresh Model button located next to the column name
- This will run the corresponding model
- A notification will give the status of this run
- Refresh the selected data table after editing the associated LiveReport by clicking on the Refresh Data Table button.